
Tools Needed
- Screwdriver (slotted or philips depending on your fixture)
- Wire stripper
- Side cutter or diagonal cutter
- Needle nose pliers

Materials Needed:
- LED light tubes
- Non-shunted lamp holders or tombstones (only if you are using single ended LED tubes)
- Wire nuts or push-in wire connectors
- Zip ties
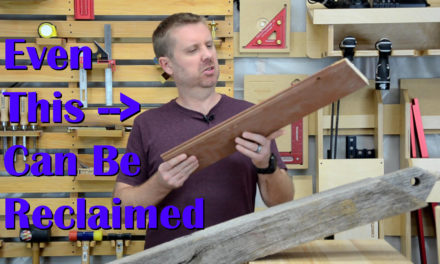
Goodbye fluorescent, hello LED!
There are multiple options when it comes to LED retrofit tubes for fluorescent fixtures. Single ended LEDs are the most involved, but still the most popular. Chris covers how to make the necessary changes to your fixture for a successful LED conversion.
Convert Any Fluorescent Fixture
IMPORTANT UPDATE: At 03:57 in this video, Chris misspoke and said non-shunted lampholders are being replaced with shunted. This is incorrect and the reverse of what is being done. Single ended LEDs require non-shunted lampholders and Chris is replacing the shunted lampholders in this fixture with those.
It is possible to purchase drop-in replacement LED tubes for existing fluorescent fixtures for a super easy LED conversion. These are very easy and just require changing the tube. However, some of you may choose (knowingly or unknowingly) single ended LED tubes which require modifications to an existing fluorescent fixture. To make this conversion you’ll need:
- Non-shunted lampholders
- Wire connectors – wire nuts or push-in connectors
- About 20-30 minutes of your time
This conversion is quite easy using these steps:
- Turn off the circuit breaker for your light
- Remove the existing fluorescent bulbs
- Remove the light reflector or any piece that covers up the ballast
- Disconnect the wires providing power to the light (white and black wires).
- (optional) Take down the light fixture – some of you may find this easier and less work than working on a ladder. If you do this, you’ll need to disconnect the ground wire coming from your house wiring.
- Cut the ballast wires going to all lamp holders and remove the ballast.
- Choose which end will receive power and remove those lampholders.
- Install new non-shunted lampholders and connect all the black leads together using a wire nut (or push-in connector) and a pig tail (this will connect to your home wiring). Do the same for the white leads.
- Trim excess wire from the lamp holders on the opposite end.
- Reinstall the fixture if you removed it.
- Reconnect the house wiring by using the pigtails and a wire connector.
- Reinstall the reflector or any ballast cover pieces.
- Attach a label or sticker indicating the fixture has been modified for single ended LED tubes (this was not in the video – thanks to the YouTube commenter who recommended this)
- Insert your single ended LEDs so the end marked for power is inserted into the non-shunted lampholders you installed.
- Turn on the circuit breaker and you switch.
- LET THERE BE LIGHT!!
Why wouldn’t I just buy a tube that is a drop-in replacement?
That’s certainly an option. It requires doubled ended LED tubes that allow or require a ballast in the fixture. These are also called plug-n-play LED tubes. The factors below cover the pros and cons.
Factors When Considering LED Tubes:
-
Single-ended vs Double-ended
- Single ended tubes have two pins on one end where power is applied. One pin for hot, one for neutral. As of this video, these are very common and easy to find.
- Double ended tubes get power connected on both ends. One end is for hot, the other end for neutral. During the filming of this video, these were more difficult to find. UL rated tubes were few and far between, but this is changing.
-
Ballast or Ballast Bypass
- All single ended tubes require removing or bypassing the ballast. Double ended tubes will vary – some require the ballast, some are optional, some require removal or bypassing.
- Keeping the ballast is far more convenient for the conversion, but comes with two disadvantages:
- The ballast will continue to consume power. It’s not much but wasted power none the less.
- The ballast can still fail which will require replacing or removing it. We recommend bypassing or removing so you never have to worry about this happening.
-
Color Temperature
- Do you like warm, orange light or more cool, blue light? Color temperature is measured in Kelvins and the lower the number to more warm or orange the light will be. The higher the number, the more cool or blue the light will be. Here are common color temperatures to choose from:
- 2500-3000K – “Warm White”
- 4000-4500K – “Cool White”
- 5000-6000K – “Daylight”
- LED lights also have a CRI number. This is the “Color Rendering Index” which is a measure of accurate colors appear under this light. A value of 100 (which you won’t find) indicates colors will look the same under this light as they would under sunlight. A higher number is typically better. Anything under 80 you may find unacceptable.
- Do you like warm, orange light or more cool, blue light? Color temperature is measured in Kelvins and the lower the number to more warm or orange the light will be. The higher the number, the more cool or blue the light will be. Here are common color temperatures to choose from:
-
Light output (lumens)
- Lumes measure how much light output the LED tube generates. The higher the number, the more light. When comparing LED tubes, don’t forget to compare lumens and watts. A higher wattage LED should produce more lumens than a lower wattage lamp. If not, it is not very efficient.
What are shunted and non-shunted lampholders or tombstones?
Lampholders, also called tombstones, are the plastic pieces on each end of a fluorescent fixture that hold the lamp in place as well as provide power to it. Each lampholders has two electrical connections – one for each pin on the end of a fluorescent tube. Most, if not all, fixture with an electronic ballast have these two connections shorted together insides the lamp holders – these are called shunted. Fixtures that have a separate ballast and starter do not have these connections shorted – these are called non-shunted.
To determine what type of lampholders you have, you can’t rely on just looking for two wires coming out of the lampholder. You’ll need to use a continuity tester or multi-meter to probe the lamp holder.
PLEASE, always check your local codes and ordinances to determine if you are allowed to perform this type of work or if you need a permit to do so. Working with electricity can be inherently dangerous and should only be done by a qualified person.
As an Amazon Associate I earn from qualifying purchases.


